When filming scenes for a non linear training scenario, you always end up with filming material that is not required for the actual training. You probably started recording before the scene actually started and you probably stopped after you already had everything on film.
Starting record early is a convenient way to mention scene and take numbers before the actual scene starts, as an easy way to document which scene and take a specific video file is for. Also, after hitting record, you and the rest of the crew probably still to need to find a hiding spot to not be in the actual scene.
The same applies for stopping a recording. After a scene is filmed, you need to come out of your hiding place, walk towards the camera and stop recording. All this additional footage needs to be trimmed in order to use it for your training scenario.
Before introducing our video trimming feature, trimming had to be done in other software than Warp Studio, like Adobe Premiere or the software available with your camera. Now, trimming can be done directly in Warp Studio, so it is no longer required to trim in any other software. This will tremendously speed up the workflow from filming to a tested and published training scenario.
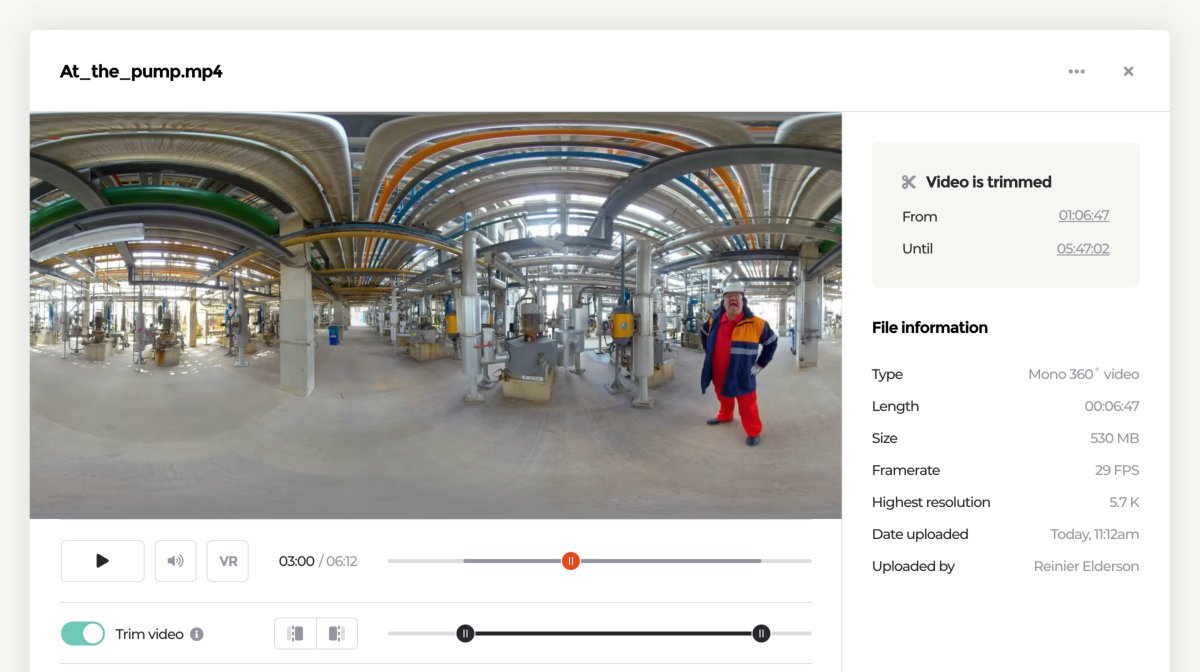
You can find video trimming on the Media page in Warp Studio. Click on any media file and activate trimming. Decide the start and end trim and take a look in the actual scene to know how the trimmed video looks like in an actual scenario.
Watch our video on trimming below to learn more.